
Living in Canada, gardening always feels like a race against the clock. We wait all winter for the ground to thaw, hustle to get everything planted by the May 24 weekend (at least in Ontario) and then hold our breath through every frost warning that hits the weather network. But here’s a secret: saving seeds is the ultimate way to stretch our short season into something that lasts year after year.
As a gardener, seed saving gives me an excuse to head out to the garden even when everything I cherished during the Summer begins to shrivel and wither away. Essentially seed saving helps extend the gardening season for me. Seed saving isn’t complicated, and once you try it, you’ll see why gardeners from coast to coast — from B.C.’s rain-soaked plots to Ontario backyard beds — keep doing it.
So Why Save Seeds?
- It saves some loonies – packets add up faster than a Timmies order for the whole hockey team.
- It toughens up your plants – saved seeds adapt to your local microclimate (be it soggy Maritimes or frosty Prairies).
- It preserve Canadian diversity – especially heirloom veggies and native-friendly herbs.
- It gives you a chance to share the wealth – nothing says “good neighbour” like passing an envelope of beans over your backyard fence or donating to a local seed library.
The Basics of Seed Saving
1. Pick the Right Plants
- One of the trickiest parts of seed saving is understanding how plants reproduce. Some plants are “loners” and can make viable seeds without much outside help, while others need a helping hand (or wing) from pollinators like bees, butterflies, or even the wind.
- Go with open-pollinated plant varieties. Open-pollinated plants produce seeds resulting in offspring that are true-to-type, meaning they resemble the parent plant unlike hybrids which might surprise you with a mystery plant next year. Open pollinator seeds from the vegetable garden include tomatoes, beans, peas, and peppers. Some flowers I always gather seeds from include cosmos, morning glories, marigolds, calendula and snapdragons.
- Cross-Pollinator seeds are for more advanced seed savers. These plants need pollen from another flower — sometimes from a different plant of the same species — to produce seeds. This is where pollinators like bees, other insects or the wind really earn their keep by moving pollen from flower to flower. What’s the catch? If you’re growing multiple varieties, they might cross and give you unexpected results. Examples of cross-pollinated vegetables include squash, pumpkins, corn, beets and radishes, as well as members of the Brasscia family (cabbage, broccoli, etc.). Since our growing seasons are short in Canada, isolating crops with multiple varieties can be difficult. If you want to save pure seed, grow only one variety of these vegetables at a time.
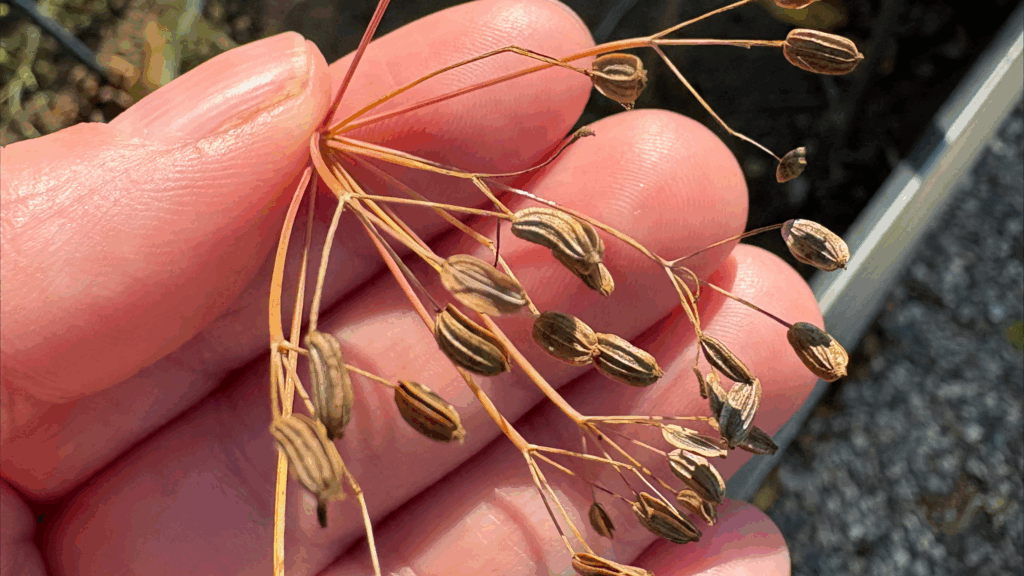
2. Harvest at the Right Time
Up here in Canada, timing your seed harvest can be the difference between a full jar of next year’s crop or a soggy mess lost to frost. With our shorter season and unpredictable weather — snow in September out West, or a surprise frost in Ontario — knowing when to pick and dry your seeds is key.
Dry seeds (beans, peas, lettuce, herbs, and native flowers):
- Wait until the pods or seed heads turn brown, crisp, and rattly.
- Beans and peas should be dry enough that you hear the seeds rattle in their pods. For lettuce, calendula, or native wildflowers, the seeds should rub off easily into your hand.
- Tip: If a cold snap is on the horizon, snip the plants and hang them upside down in a garage or shed to finish drying.
Wet seeds (tomatoes, cucumbers, squash, peppers, melons):
- Harvest when the fruits are fully ripe—think tomatoes that are past sandwich-perfect, or cucumbers left long past the crunchy salad stage and turning yellow.
- For tomatoes, scoop out the seeds and let them ferment for a couple of days in a jar of water. This breaks down the gel coat and helps prevent diseases like early blight, which is all too common in damp Canadian summers.
- Spread seeds thinly on a plate to fully dry. Do not rush this step. Seeds should be completely dry before storage.
3. Dry Like a Prairie Wind
- Drying is one of the most important steps in seed saving. Spread your cleaned seeds in a single layer on a ceramic plate, or fine mesh screen. Avoid paper towel unless you like permanent seed art. Allow them to dry in a cool, dark place with good air circulation, away from humidity. Stir them gently every day or two to prevent clumping and mold. A truly dry seed will snap or break rather than bend. It can take up to a week or two before they are ready to store.
4. Label & Store for the Long Winter
- Once your seeds are fully dry, tuck them into paper envelopes or small glass jars—something that breathes a little and keeps them safe from moisture.
- Label each packet clearly with the plant name, variety, and year harvested (because you will forget – trust me!)
- Store them in a cool, dark, and dry place like the back of the pantry beside the maple syrup stash.
- Properly stored, many seeds will stay viable for several years.
How Long Will Seeds Last?
Not all seeds last the same amount of time in storage. Lettuce, onions, and parsnips are short-lived and usually best used within a year or two. Beans, peas, squash, and tomatoes can often stay viable for four to six years if kept cool and dry. Some seeds—like cucumbers and brassicas—fall somewhere in between. A simple way to test older seeds is with a germination test: place a few on a damp paper towel, tuck it into a plastic bag, and check for sprouts after a week.
Start Small, Grow Big
You don’t need a greenhouse empire to save seeds. Start with just one or two plants this year. Before you know it, you’ll have mason jars full of homegrown seed — little time capsules of summers past, ready to sprout again next spring.
Because let’s be honest: Seed saving is thrifty yes, but it is also about resiliency. Canadian winters are long. It feels good to know next year’s garden is already waiting, tucked away in a paper envelope, reminding you that warmer days will return.
🌱Happy Seed Saving!